Basic troubleshooting for Armbian on SBCs
Essential troubleshooting guide for Armbian SBCs covering power supply issues, storage failures, network problems, and serial console debugging to quickly restore system functionality.

Single board computers running Armbian offer incredible flexibility and power, but like any mini-computer, they can occasionally hit a snag. When your trusty SBC goes quiet or acts erratically, a systematic approach to troubleshooting can save you hours of frustration. Here are some fundamental steps to get your Armbian-powered device back on track.
1. The power supply: often the culprit
Before you dive into complex software diagnostics, always, always check your power supply. Undervoltage is perhaps the most common cause of instability, random reboots, and even failure to boot on SBCs.
- Avoid cell phone chargers: While many cell phone chargers feature a USB output and provide 5V, they are generally not recommended for powering SBCs. Phone chargers are designed primarily for charging batteries, which have different power draw characteristics. They often lack the stable voltage regulation required by SBCs, especially under fluctuating loads. This can lead to voltage sags, causing instability, corruption of your storage medium, and unreliable operation. Always opt for a dedicated power supply designed for SBCs, or a high-quality regulated power supply that meets or slightly exceeds your board's recommended voltage and amperage.
- Verify voltage and amperage: While most boards are rated for 5V, in practice, many SBCs actually perform better with a slight overvoltage, typically around 5.1V or 5.2V. This compensates for voltage drops across cables, connectors, and the board's own circuitry. Even official power supplies for popular boards like the Raspberry Pi and Orange Pi often provide this subtle increase. Ensure your power supply meets the current (amperage) requirements specified by your board's manufacturer, as many consumer USB chargers may not deliver sufficient stable current under load.
- Cable quality: Don't overlook the USB cable itself. Thin or long cables can introduce significant voltage drop, even if your power adapter is robust. Opt for short, thick cables designed for both data and power.
- LED indicators: Pay attention to any status LEDs on your board. A consistently lit red LED (often indicating power) might be good, but a rapidly blinking or absent one could signal a power issue. Some boards also have green or blue LEDs that indicate activity; if these are absent, it could point to a boot failure.
2. The storage medium: a common point of failure
As discussed previously, microSD cards, while convenient, are prone to issues. eMMC and NVMe are more robust, but can still encounter problems.
- Re-seat the card/drive: For microSD cards, remove and re-insert it firmly. For eMMC modules or NVMe drives, ensure they are properly seated in their respective slots.
- Test the storage: If you suspect the storage, try flashing the Armbian image to a different, high-quality microSD card (Class 10, A1, or A2 rated is recommended). Tools like H2testw (Windows) or F3 (Linux) can verify the integrity and true capacity of your microSD card, weeding out fakes or faulty units.
- Re-flash the image: Sometimes, an image write can be corrupted. Re-flashing Armbian to your storage device using a reliable tool like USBImager can resolve boot issues.
- File system corruption: Abrupt power cuts can corrupt the file system, especially on microSD cards. While Armbian includes some resilience, a deeply corrupted card might prevent booting.
3. First boot and initial access: getting connected
If your board seems to power on but you get no display or remote access, consider these points:
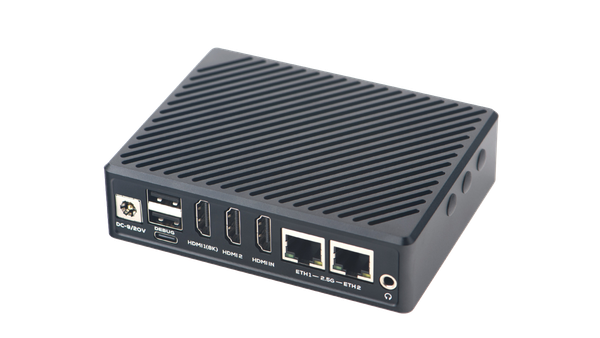
- Display output (HDMI): While many SBCs come with an HDMI connector, having the port is not a guarantee that it will be immediately or reliably functional. On some boards, especially those with newer System-on-Chips (SoCs), HDMI drivers might still be in active development, or there could be specific kernel or firmware dependencies. If you're encountering display issues, first try a different HDMI cable and a different monitor or TV. If the problem persists, recognize that the HDMI output might not be stable for your specific Armbian build or board revision.
- Resolution issues: If you can gain access via SSH (see below) or by mounting the SD card on another machine, you might need to manually edit
/boot/armbianEnv.txtto force a lower resolution (e.g.,hdmimode=1080p) if it's a resolution compatibility problem.
- Resolution issues: If you can gain access via SSH (see below) or by mounting the SD card on another machine, you might need to manually edit
- Network (SSH/Ethernet/Wi-Fi):
- Ethernet connection: This is the most reliably verified working method for initial access and troubleshooting on Armbian. Ensure your Ethernet cable is securely plugged in and the port LEDs are active. Check your router's connected devices list for your SBC's assigned IP address.
- Wi-Fi issues: If using Wi-Fi, ensure your
armbian-configsettings (accessible viasudo armbian-configif you have serial or keyboard/monitor access) are correct, including SSID and password. Sometimes, Wi-Fi drivers require specific firmware that might not be active, or kernel updates can temporarily break Wi-Fi functionality. It's also worth noting that some Wi-Fi modules may require thearmbian-firmware-fullpackage to be installed for proper operation. - SSH credentials: For initial SSH access, Armbian typically uses
rootwith password1234. You'll be prompted to change this on first login. If "Connection Refused" appears, ensure the SSH service is running (it usually is by default). Check for firewall rules on your network or the SBC that might be blocking port 22.
4. Advanced debugging: the serial console
When an SBC fails to boot, provides no display output, and isn't accessible over the network, the debug serial console becomes your most powerful diagnostic tool. It offers direct, low-level communication with the board, allowing you to see boot-up messages, kernel errors, and login prompts even when the system is otherwise unresponsive.
- What you need:
- A USB-to-TTL serial adapter (e.g., based on FTDI FT232R, CP2104, or CH340 chips). The CP2104 is often preferred as it reliably supports higher baud rates (like 1.5Mbaud for some Rockchip SoCs), while older CP2102 chips might be limited to 115200 baud, which is common for Amlogic and Allwinner. Ensure your adapter is a 3.3V model, as 5V adapters can permanently damage your SBC.
- Jumper wires to connect the adapter to your SBC.
- A host computer (Windows, macOS, Linux) with a terminal emulator program.
- Connecting:
- Locate the UART (Universal Asynchronous Receiver-Transmitter) pins on your SBC's GPIO header. You'll typically look for
Tx(Transmit),Rx(Receive), andGND(Ground) pins. - Connect
GNDon the adapter toGNDon the SBC. - Connect
Txon the adapter toRxon the SBC (cross-over connection). - Connect
Rxon the adapter toTxon the SBC (cross-over connection). - Crucially, do NOT connect the VCC/3.3V/5V pin from the adapter to your SBC unless your SBC explicitly needs it for the UART to function, which is rare. The SBC should be powered by its primary power supply.
- Locate the UART (Universal Asynchronous Receiver-Transmitter) pins on your SBC's GPIO header. You'll typically look for
- Accessing the console:
- Plug the USB-to-TTL adapter into your host computer. Drivers might install automatically or require manual installation.
- Identify the serial port (e.g.,
COMxon Windows,/dev/ttyUSBxor/dev/tty.usbserial-xxxxon Linux/macOS). - Open your terminal emulator (e.g., PuTTY on Windows, Minicom or
screenon Linux/macOS). - Configure the serial connection: Baud rate is typically 115200 (for Amlogic, Allwinner) or 1.5Mbaud (1,500,000) for some newer Rockchip boards, 8 data bits, no parity, 1 stop bit (8N1).
- Power on your SBC. You should immediately start seeing bootloader messages (U-Boot, GRUB) followed by kernel boot messages. This output can pinpoint exactly where the boot process is failing, providing invaluable clues for debugging.
5. Software and configuration deep dive
If the basic checks pass, the issue might lie within the Armbian software configuration.
- Kernel updates: While updates bring improvements, sometimes a new kernel version can introduce regressions for specific hardware. If a problem appeared after an
apt upgrade, consider if it was a kernel update. Armbian allows managing kernel versions, though this is an advanced step. armbian-config: This invaluable tool, run viasudo armbian-config, provides a text-based interface to manage many system settings, including networking, boot options, and installing software. It's often your first stop for diagnosing and fixing configuration issues.- Log files: When you can gain access (via SSH or serial console), review system logs for clues. Commands like
dmesg(kernel messages),journalctl -xe(systemd journal), and logs in/var/logcan reveal errors.
Troubleshooting an SBC with Armbian often involves a blend of hardware checks and software diagnostics. By systematically ruling out common issues, you can efficiently pinpoint the root cause and get your single board computer project back on track.
For further assistance and community support, you can find help on the official Armbian forum and their Discord server. When seeking help, it is always beneficial to include the output of armbianmonitor -u which provides crucial system information to diagnose your issue.


